How to use adult diapers properly for elderly
by Aishule Hygiene Products
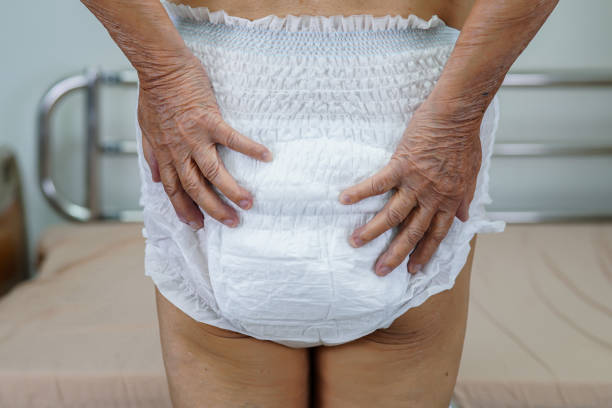
Proper adult diaper use: correct size from measurements, tab-style diapers fastened with the back panel high and tabs symmetrical, pull-ups centered, and a five-point fit check after every change.
Quick Answer
Quick answer: Proper use comes down to four habits: choose the correct size from waist and hip measurements, put the product on with the right technique (fold and angle for tab-style diapers, step in and center for pull-ups), check the fit after every change (cuffs out, two-finger waist gap), and change on a schedule rather than waiting for saturation.
Most complaints about adult diapers — leaks, rash, odor, discomfort — come from technique, not from product quality. The same diaper can work perfectly for one user and badly for the next purely because of how it is put on. This guide walks through the correct technique for both product styles and the checks that keep them working.
Start with the size
Measure the waist and the widest part of the hips, then follow the manufacturer's size chart. Do not size up "for safety" — an oversized diaper gaps at the legs and leaks sooner than a correctly fitted smaller one. Do not size down for slimness either; pressure marks and rejection follow within a day.
Putting on a tab-style diaper
- Fold it lengthwise front-to-back so the absorbent channel is centered and the back panel is slightly longer than the front.
- Position the back panel between the cheeks with the higher edge at the waistline. The back must sit higher than the front — this is the single most important step for leak prevention.
- Bring the front panel up between the legs and spread it flat over the lower abdomen.
- Fasten the lower tabs first, angled slightly upward toward the navel; then the upper tabs, angled slightly downward. This creates a gentle, even pull around the legs.
- Check symmetry: tab positions should mirror each other. Uneven tension is the main cause of one-sided leaks.
- Pull out the leg cuffs so they stand in the groin crease. Cuffs tucked inside the leg opening are the number-one cause of leaks in otherwise correct technique.
Putting on pull-up pants
- Step in like regular underwear — sitting down or standing with support, whichever is safer for the user.
- Pull up to the waist, making sure the fabric-covered waistband sits level, not bunched.
- Center the absorbent zone: the widest part of the core should sit under the perineum, both front and back.
- Smooth the leg gathers outward so they seal around the thighs without digging in.
The fit checklist after every change
| Check | Pass condition |
|---|---|
| Back panel height | Sits at the natural waistline, higher than the front |
| Waist gap | Two fingers slide under the waistband comfortably |
| Leg cuffs | Pulled outward, standing in the groin crease |
| Tab symmetry | Mirrored positions, equal tension |
| Comfort check | No red marks after one hour of wear |
Common mistakes to avoid
- Fastening tabs very tight to "prevent leaks" — tightness causes pressure marks; positioning prevents leaks.
- Skip-checking the cuffs. Pulled-out cuffs are the main leak barrier.
- Waiting for full saturation before changing. Change on the wetness indicator and the clock.
- Reusing a partially worn tab-style diaper by re-taping in different positions more than once — refastenable tapes allow adjustment, not unlimited re-use.
Building routine and dignity
For elderly users, how a diaper is put on is part of how care feels. Explain each step, work at the user's pace, and let semi-independent users do the final pull-up themselves. Small habits preserve dignity and cooperation, which in turn makes every later step — checking, changing, skin care — easier.
Key takeaways
- Measure waist and hips; trust the size chart over guesswork.
- Back panel high, tabs symmetrical and angled, cuffs pulled out.
- Pull-up pants: step in, level waistband, centered core.
- Run the five-point fit checklist after every change; it takes thirty seconds.
Related reading: all news and articles · product range · contact us.
Recent Posts
- Reliable Chinese Manufacturers of Adult Diapers and Underpads
- Deodorized adult diapers are effective in eliminating odor and inhibiting bacteria
- What is the most discreet adult diaper?
- How to choose the size of incontinence adult diapers?
Contact Aishule Hygiene Products
- Address (China HQ): Northwest Corner, Qiyang Road and Industrial 3 road intersection, High-tech Zone, Linyi, Shandong, CHINA
- Address (Malaysia Office): Advanced Safety Lifecare Sdn. Bhd. LOT 7962, BATU 22, JALAN JOHOR BAHRU-AIR HITAM, 81000 KULAI, JOHOR, MALAYSIA
- Tel: +86-539-8488855 / +86-539-8488865
- Email: info@jingxincare.com
- Business hours: Mon - Fri 9:00 - 21:00
- Send an inquiry